Auto-captured events
Usermaven supports event tracking through both automatic and manual methods, giving you full control over your analytics data. Auto-captured events automatically record common user interactions on your website, so you don’t need to manually define every event. This helps you quickly understand how users interact with your site and reduces the risk of missing critical actions.
How auto-captured events work
By default, Usermaven’s tracking script automatically captures common front-end user interactions once the tracking pixel is installed and auto-capture is enabled. These events start flowing into your workspace shortly after setup, with no additional configuration required.
Important: Auto-captured events must be enabled during pixel installation. If disabled, only page views will be tracked.
What auto-capture tracks
Usermaven automatically captures the following interactions:
- Page views
- Page views are always tracked, even if auto-capture is disabled.
- Clicks on most elements, including:
- Buttons
- Links
- Images
- Icons
- Headings
- Input interactions, such as:
- Typing or changing values in input fields
- Text areas
- Dropdowns (select fields)
- Form submissions
- Events from most pop-ups
Each event includes useful context such as the element type, text, and source page URL, helping you analyze user behavior in detail.
Privacy & security considerations
Usermaven is built with privacy in mind:
- Events inside iframes are not tracked
- Sensitive data is automatically excluded, including passwords and secure input values
- For input fields, only the name, id, and class attributes are captured, never the actual sensitive values
This ensures compliance while still providing meaningful behavioral insights.
Enabling auto-captured events
Auto-captured events are enabled from the tracking pixel setup screen.
To enable auto-capture:
- Go to Workspace Settings → Add Tracking Pixel
- Insert the tracking script into your website’s
<head>section - Make sure the Auto-capture Events toggle is switched ON
- Save and publish the changes
Once enabled, Usermaven will automatically start collecting interaction data from your site.
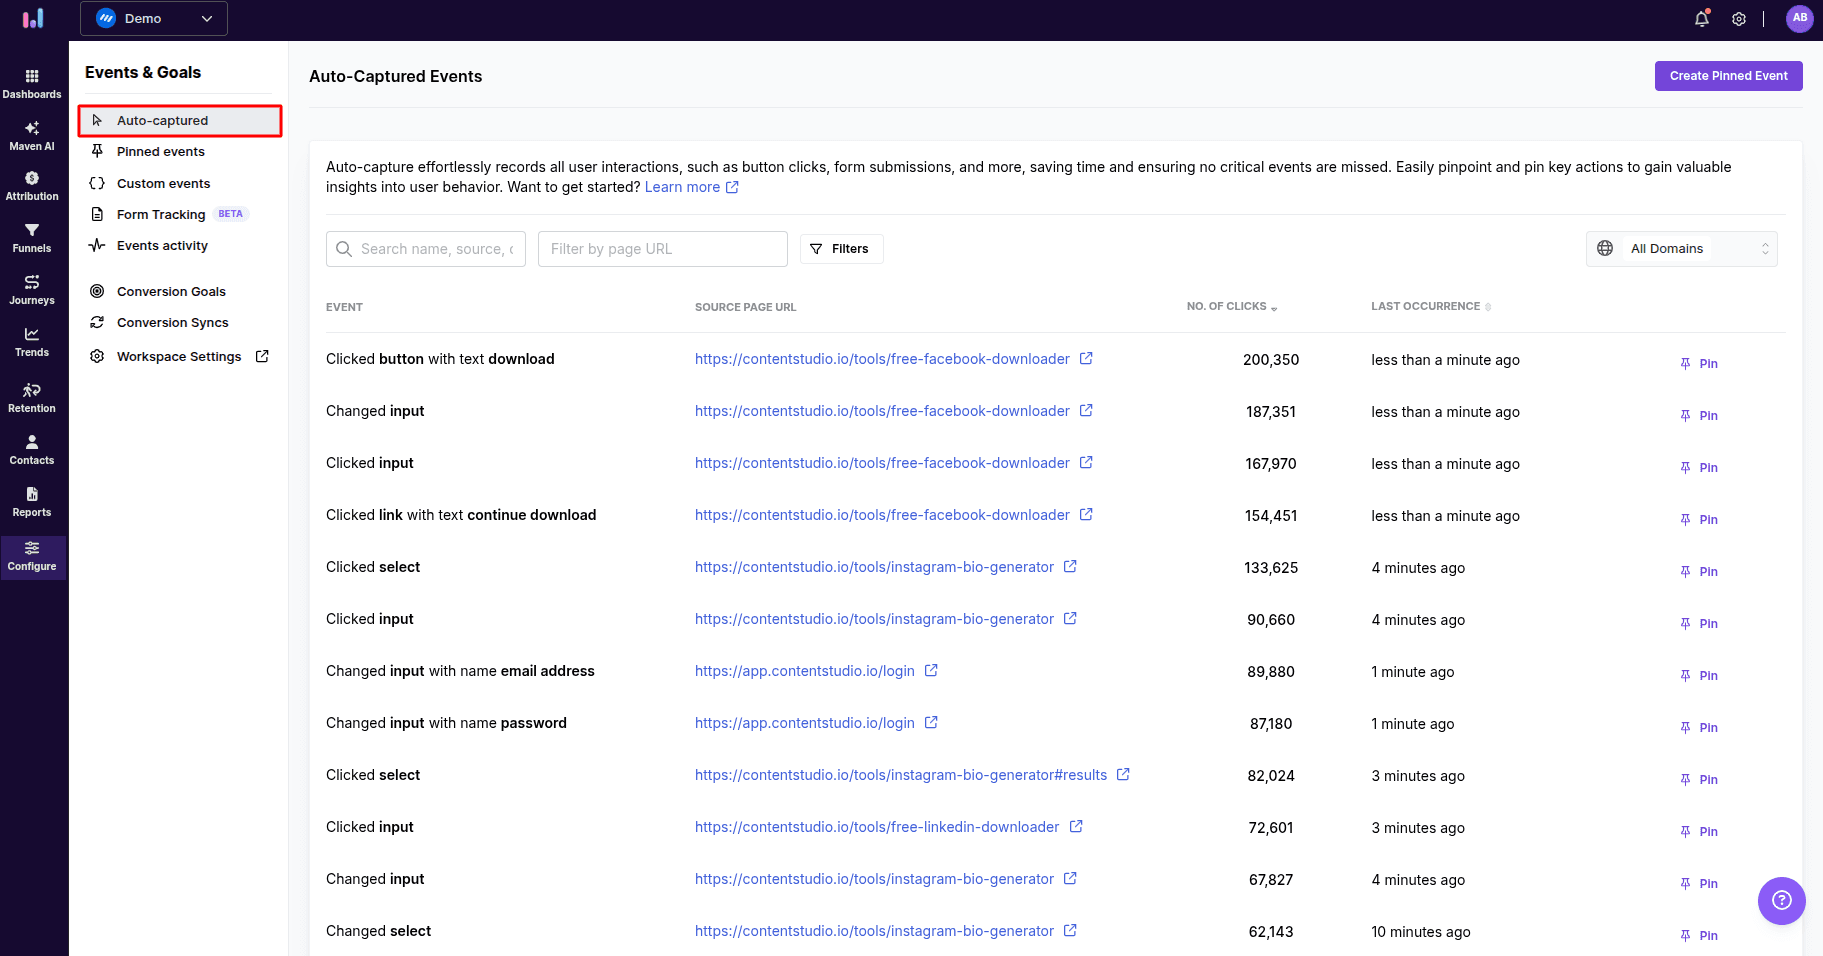
Viewing auto-captured events
You can view all auto-captured events by navigating to:
Configure → Events & Goals → Auto-captured
From here, you can:
- Search events by name or source
- Filter by page URL or domain
- See total clicks and last occurrence
- Pin important events to convert them into tracked or goal events
Next steps
- Pin important auto-captured events to track conversions
- Create funnels using auto-captured interactions
- Combine auto-captured and custom events for deeper analysis
Auto-capture provides a baseline view of user behavior with no manual setup required.
Managing auto-captured event volume
Auto-capture is powerful, but it can sometimes collect interactions from noisy or low-value areas of your site. This may clutter reports and increase overall event volume.
To stay in control, Usermaven lets you:
- Exclude specific elements (for example, navigation bars or footers)
- Disable auto-capture on selected pages (such as admin dashboards)
- Turn off auto-capture entirely and rely on manual event tracking
For a complete walkthrough of all exclusion options and best practices, see the “Exclude auto-capture events” guide.